Most home cooks have a “junk drawer” knife—a once-mighty bread knife that now tears through sourdough rather than slicing it. Because of their unique, tooth-like geometry, many people assume these blades are disposable or impossible to maintain at home. This is a myth that leads to unnecessary waste and dull, dangerous kitchens.
Learning how to sharpen a serrated knife requires a different mindset than sharpening a smooth chef’s knife. You aren’t working on a flat plane; you are working on individual “gullets.” In this guide, we will break down the specialized tools and the meticulous “tooth-by-tooth” technique required to bring your serrated edges back to life.
Understanding the Anatomy of a Serrated Blade
Before you begin, you must understand what you are actually sharpening. A serrated knife is essentially a series of small, curved chisels.
The Serrations (Gullets)
The “teeth” of the knife are the pointed tips, but the sharp edges are actually the recessed curves between them, known as gullets. Most serrated knives are ground on only one side (a single bevel). If you look closely, you’ll see one side of the blade is flat, while the other is angled.
Why They Feel “Sharp” Even When Dull
Serrated knives stay functional longer than straight blades because the recessed gullets don’t touch the cutting board. Only the tips make contact. However, once those gullets lose their edge, the knife will begin to “rip” fibers instead of slicing them.
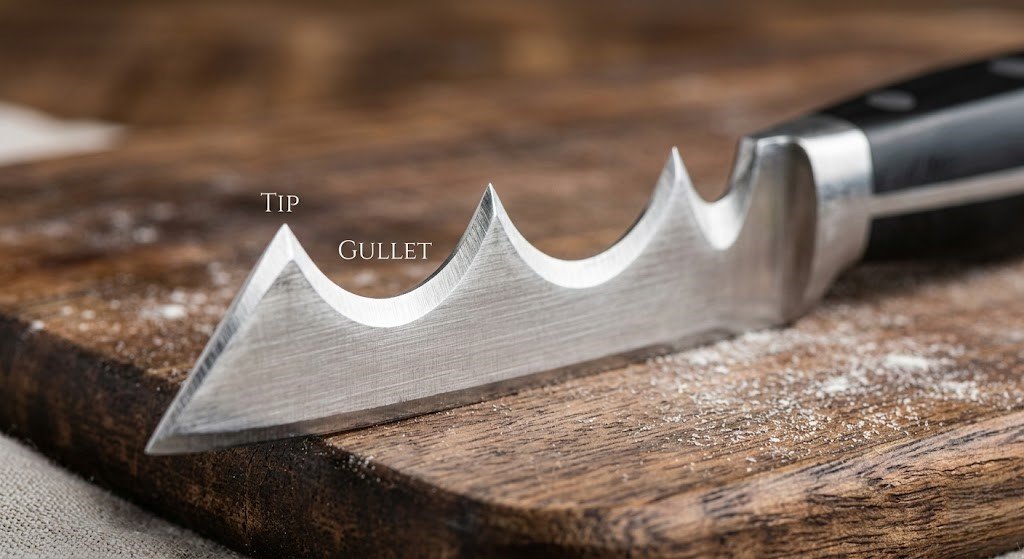
Understanding the anatomy of your blade: the gullets are where the actual slicing power resides.
Necessary Tools: Why Your Flat Stone Won’t Work
You cannot use a standard flat whetstone to sharpen a serrated knife. Doing so would only grind down the tips and ruin the saw-like profile. Instead, you need a Ceramic Sharpening Rod (also known as a Honing Rod or a Sharpening File).
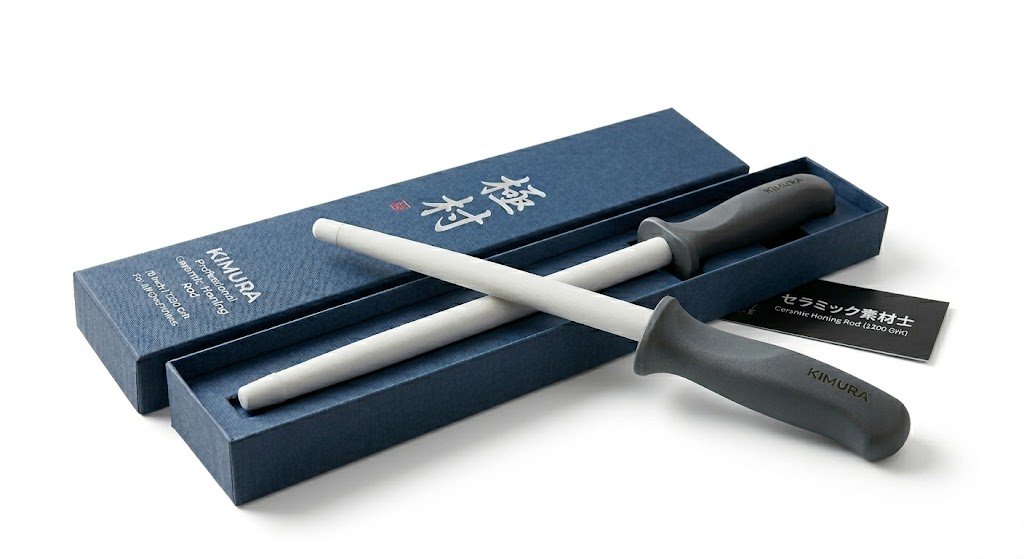
- Tapered Ceramic Rods: These are ideal because the diameter changes from the tip to the base, allowing you to find the perfect fit for different-sized serrations.
- Diamond Sharpening Files: Best for knives with very hard steel or significant damage, though they remove metal more aggressively.
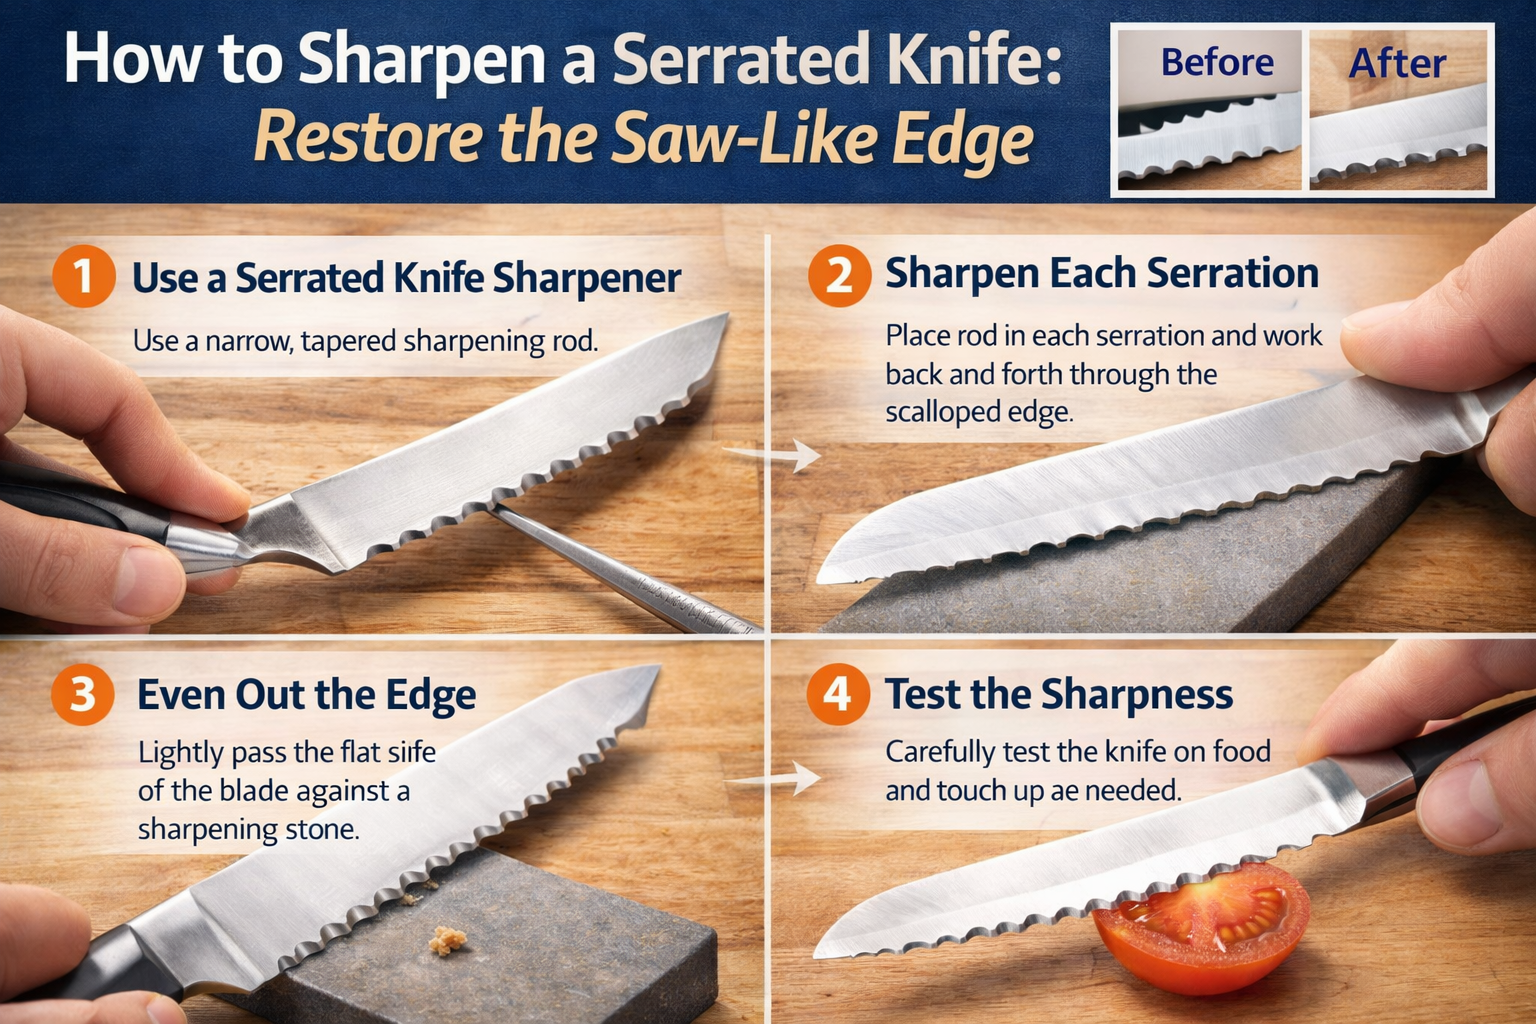
Step-by-Step: How to Sharpen a Serrated Knife
Sharpening a serrated blade is a repetitive but rewarding process. Follow these steps to ensure a uniform, razor-sharp finish.
Step 1: Identify the Beveled Side
Look at your knife. One side will be flat, and the other will have the angled grind of the serrations. You will only be sharpening the beveled side. ### Step 2: Match the Rod to the Gullet
Select a tapered sharpening rod. Insert the rod into one of the serrations. Slide it forward or backward until the diameter of the rod perfectly matches the width of the gullet.
Step 3: Set the Angle
Most serrated knives have a bevel angle of about 15° to 20°. Lay the rod in the gullet and tilt it to match that factory angle. You want the rod to be flush against the curved metal.
Step 4: The Sharpening Stroke
- Using short, controlled strokes, push the rod away from the edge (toward the spine of the knife).
- Apply light to moderate pressure.
- Perform 5–10 strokes per serration.
- Important: Consistency is key. If you do 6 strokes on the first tooth, do 6 on every tooth to keep the wear even.
Step 5: The “Feel” for the Burr
Just like with a straight blade, you are looking for a burr. After sharpening a few teeth, run your finger along the flat side of the knife. If you feel a tiny, rough ridge of metal, you have successfully sharpened through to the edge.
Step 6: Removing the Burr (De-burring)
Once you have finished every serration, flip the knife over to the flat side. Lay the blade almost flat against a fine-grit whetstone or use your ceramic rod. Gently swipe the length of the blade once or twice to “snap off” the burr.
Comparison: Sharpening Rods vs. Other Methods
| Method | Precision | Ease of Use | Best For |
| Tapered Ceramic Rod | Excellent | Moderate | High-quality bread & steak knives |
| Electric Sharpener | Poor | Very Easy | Cheap knives (can wear down teeth fast) |
| Triangle Sharpmaker | Great | Easy | Maintaining angles consistently |
| Professional Service | Perfect | Effortless | Rare or expensive custom serrations |
Maintenance: Keeping the Saw Sharp
Because of their design, you don’t need to sharpen serrated knives often. However, proper care can extend the life of the edge by years.
- Stop “Sawing” Hard Surfaces: Never use your serrated knife on ceramic plates or glass boards. This blunts the tips instantly.
- Clean the Gullets: Food residue can build up in the serrations, making them feel dull. Use a stiff brush to keep the “valleys” clean.
- Hone Occasionally: If the knife is just starting to struggle, a few quick passes with a ceramic rod (without the full sharpening pressure) can realign the edge.
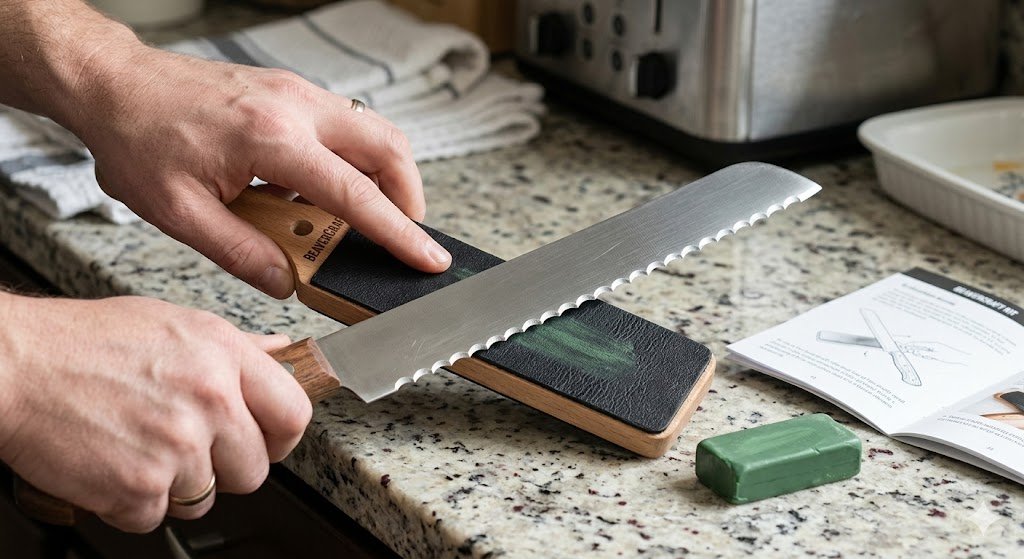
Stropping the flat side of the blade helps remove the final microscopic burrs for a clean, snag-free slice.
When is a Serrated Knife Beyond Repair?
If the “teeth” have been ground down so far that the blade looks like a wavy line rather than a saw, it may be time for a professional reprofiling. However, for 90% of home knives, a 20-minute session with a tapered rod will fix almost any dullness.
Learning the nuances of how to sharpen a serrated knife ensures that your most specialized tools are always ready for the job, whether you’re slicing a delicate tomato or a crusty baguette.
Staying prepared is about more than just having the right tools; it’s about knowing how to use them effectively when it matters most. From your kitchen to your outdoor gear, keeping your equipment in top shape is a hallmark of true craftsmanship.
Read More Guide On: How to Sharpen a Knife: Master the Professional Edge
Frequently Asked Questions
Can I use a regular honing steel on a serrated knife?
Only if the steel is thin enough to fit inside the serrations. Most standard kitchen honing steels are too thick and will only hit the tips of the teeth, leaving the cutting edge dull.
Do I sharpen both sides of the serrations?
No. Almost all serrated knives are single-beveled. Sharpening the flat side will ruin the knife’s ability to cut straight. Only sharpen the side with the visible grooves.
How do I sharpen a knife with “scalloped” edges?
Scalloped edges (rounded serrations) are sharpened exactly like pointed serrations. Use a tapered rod that matches the curve of the scallop.
What happens if I use a flat stone by mistake?
You will essentially turn your serrated knife into a straight-edged knife. While it will still cut, it will lose the “bite” required to break through tough crusts or skins.
Is it worth sharpening a cheap serrated knife?
Yes! Even a $10 bread knife can be made to perform like a $100 blade with a properly sharpened ceramic rod.
Conclusion
The mystery of how to sharpen a serrated knife often stops people from maintaining their best bread and utility blades. By investing in a simple tapered ceramic rod and taking the time to work through the gullets one by one, you save money and improve your kitchen safety.
A sharp serrated knife should feel like a precision instrument, not a blunt saw. With the right angle and a bit of patience, you can restore that factory-fresh “bite” to any blade in your collection.